Master Inventory Get Started
Get Started with Master Inventory
Master Inventory
Thanks for purchasing Master Inventory follow this docs to learn how easy is to implement in you game.
Requirements
- Unreal engine 5.3 or above
- Awesome game 😎.
(01) Installation
First you need to (migrate) the Master Inventory asset to your existing project, to do that follow the next steps.
Before migrating your assets, please ensure that you have backed up your project. While the integration has been designed to interfere as little as possible with your project, it is always advisable to have a backup as a precautionary measure.
Migrating your asset from one project to another.
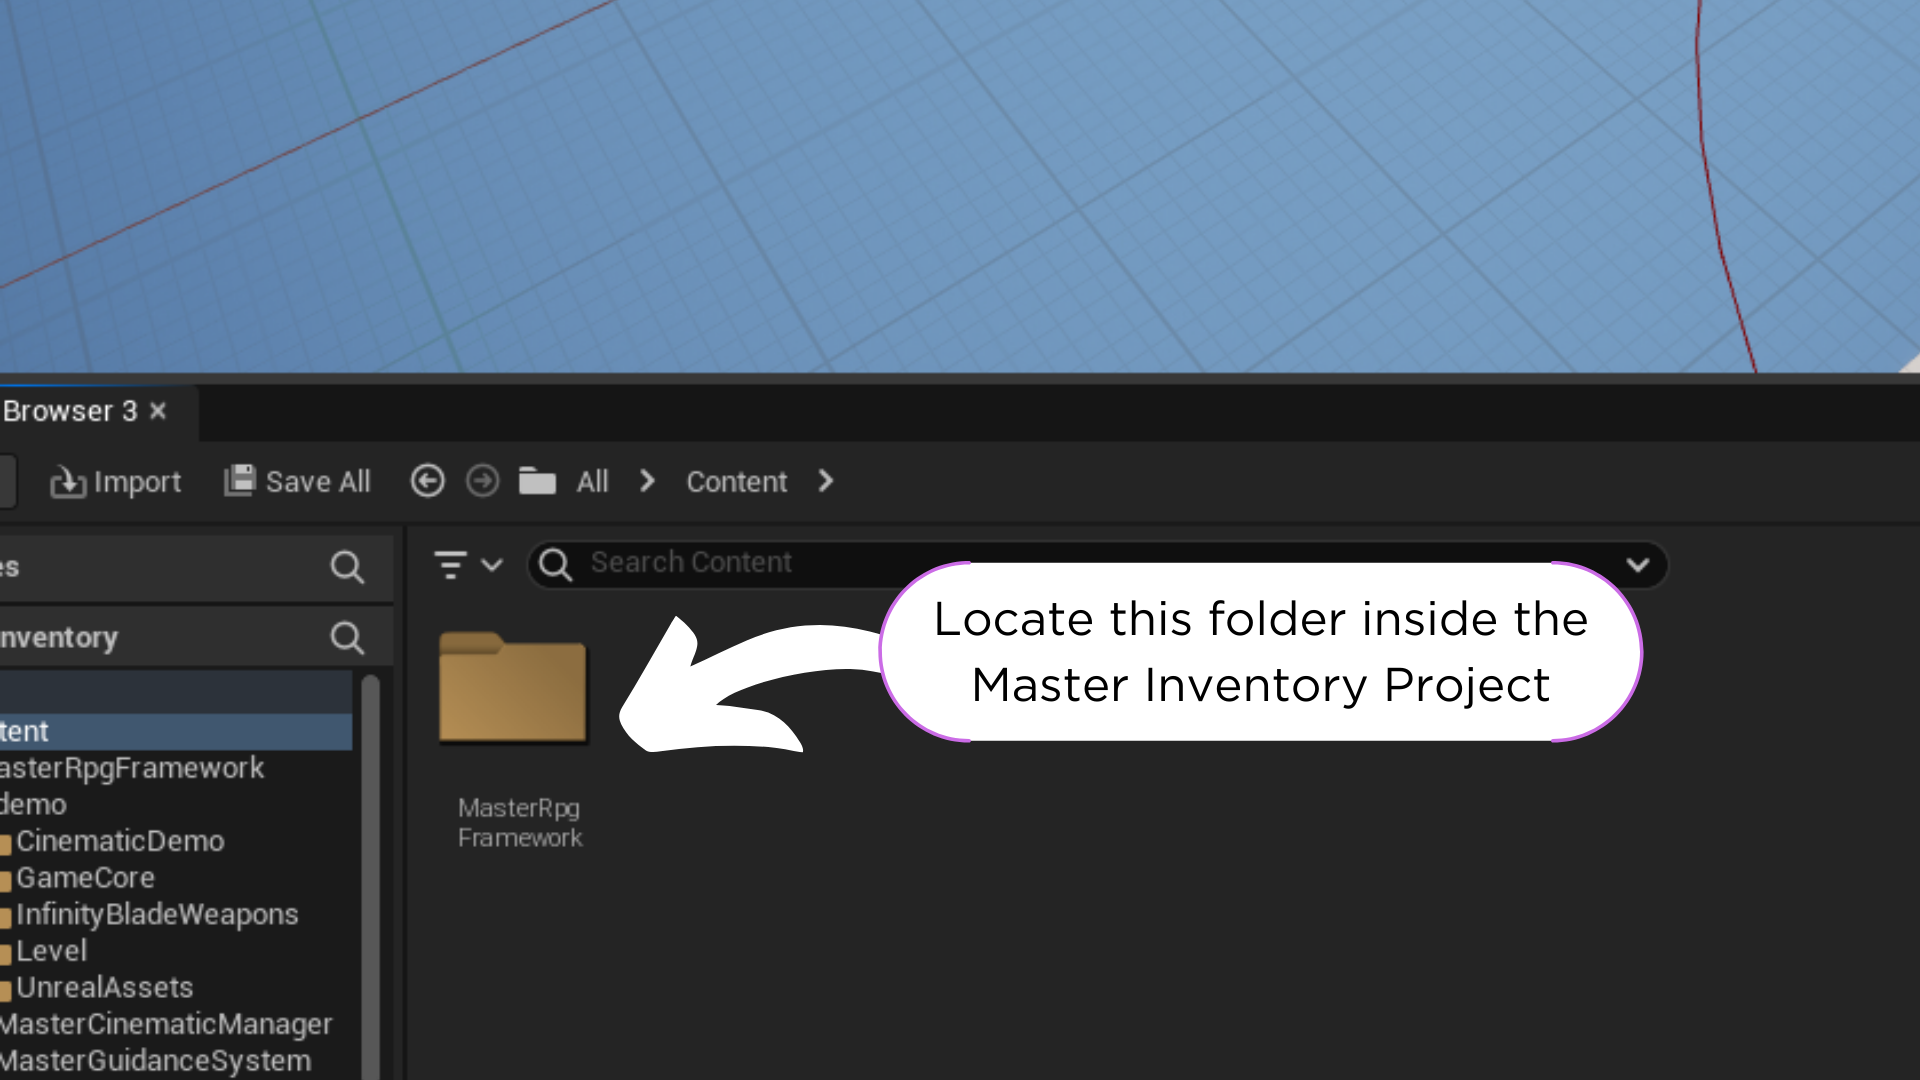
1. Locate the MasterRpgFramework asset folder in the content browser of the project.
2. Right click on the MasterRpgFramework folder and select Migrate from the context menu.
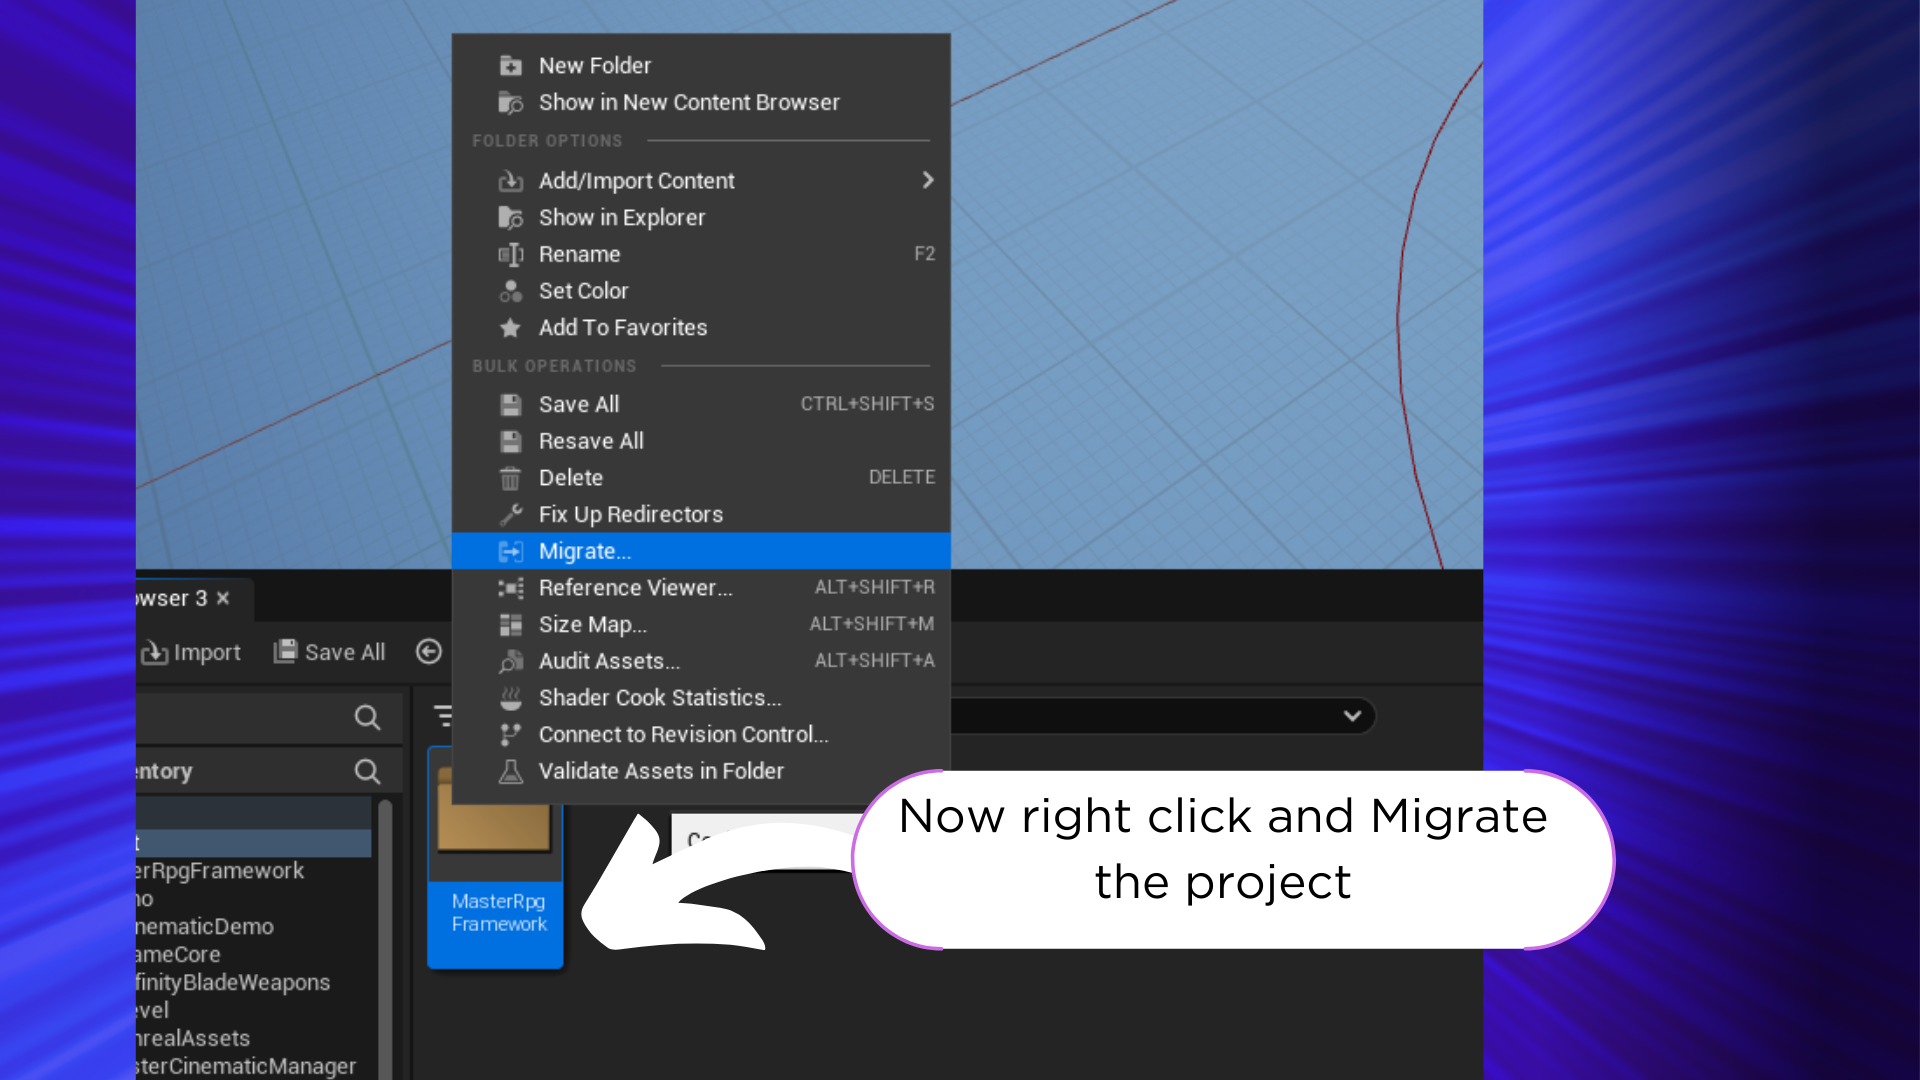
3. In the context menu select MasterRpgFramework and press OK.

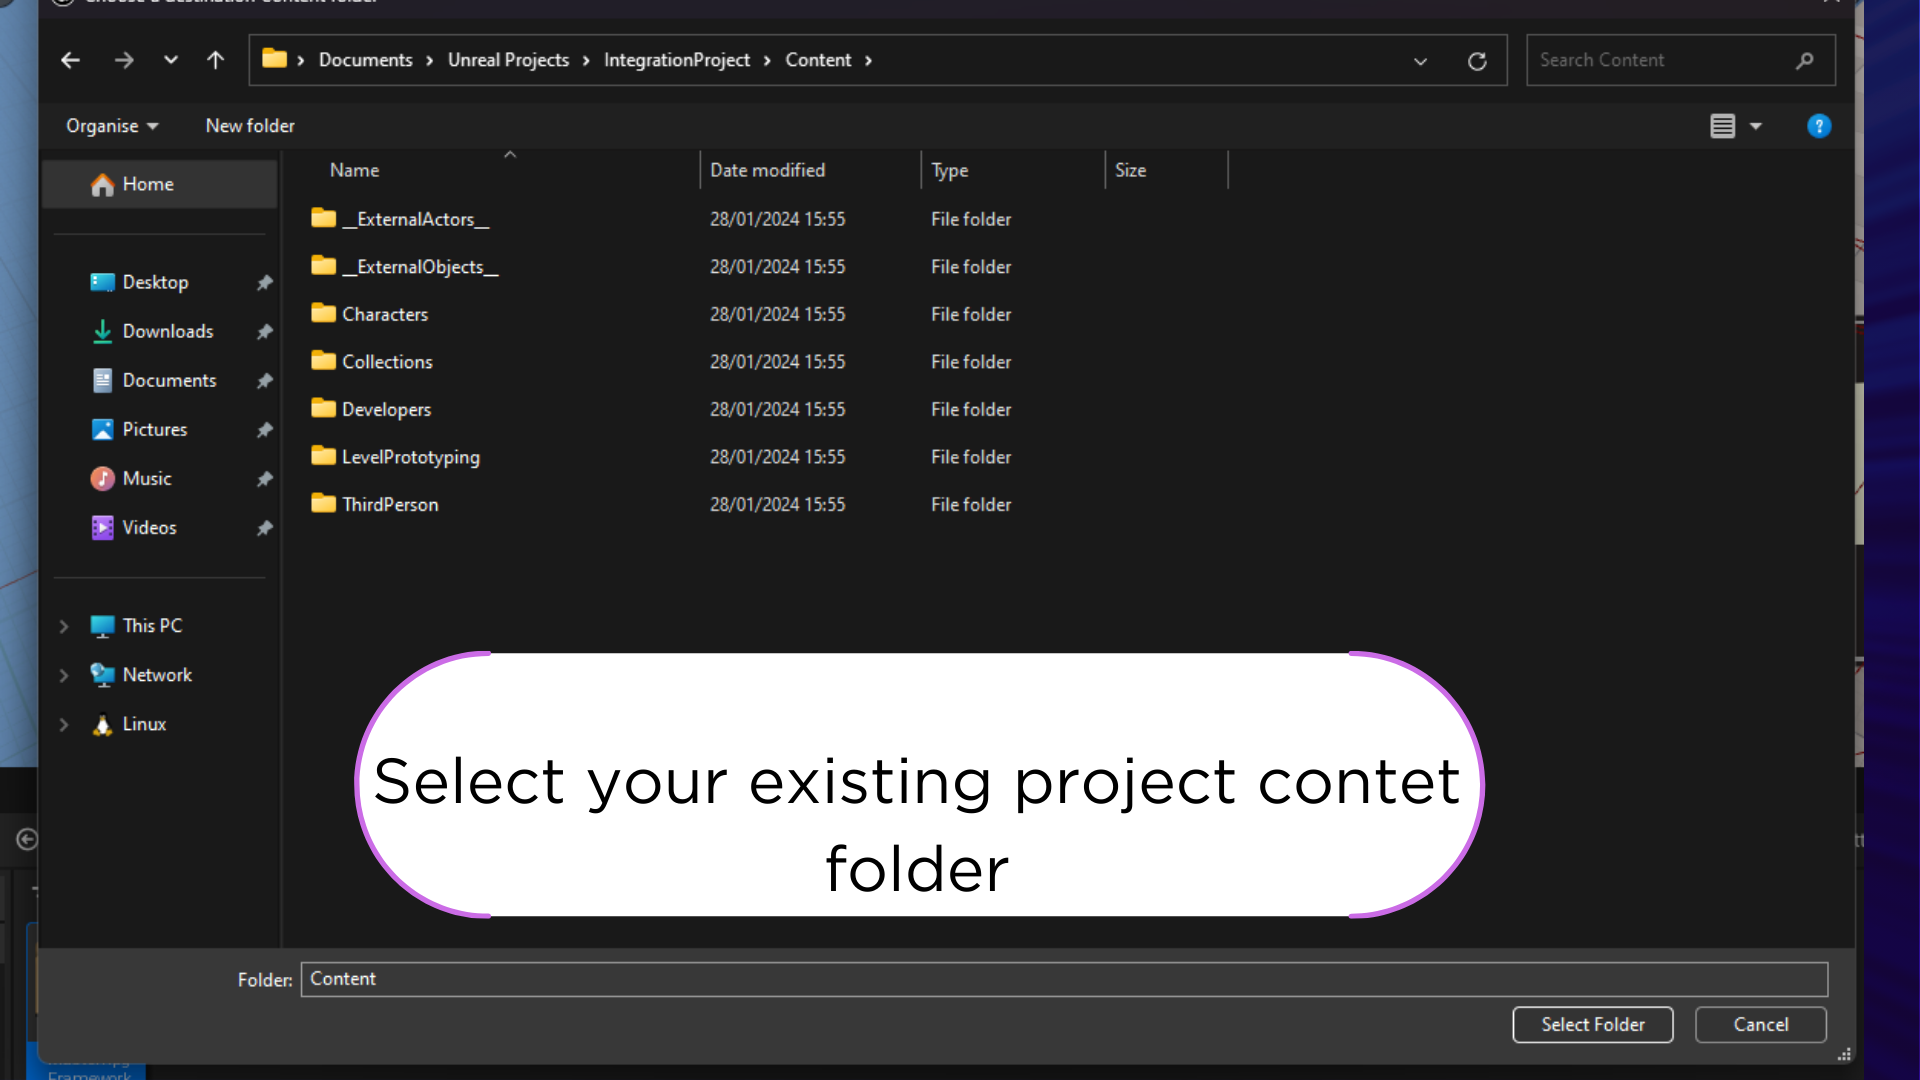
4. Select the destination project and press Select Folder, make you sure you select the Content folder.
Ay thats it, now you have the MasterRpgFramework in your project, now lets set the configuration required.
(02) Project integration (Controller Events Setup)
Now you need to add the BPC_MasterInventory component to your player controller, to do that follow the next steps.
i am assuming you already have a player controller for you game, if not please create one and attach it to your game mode.
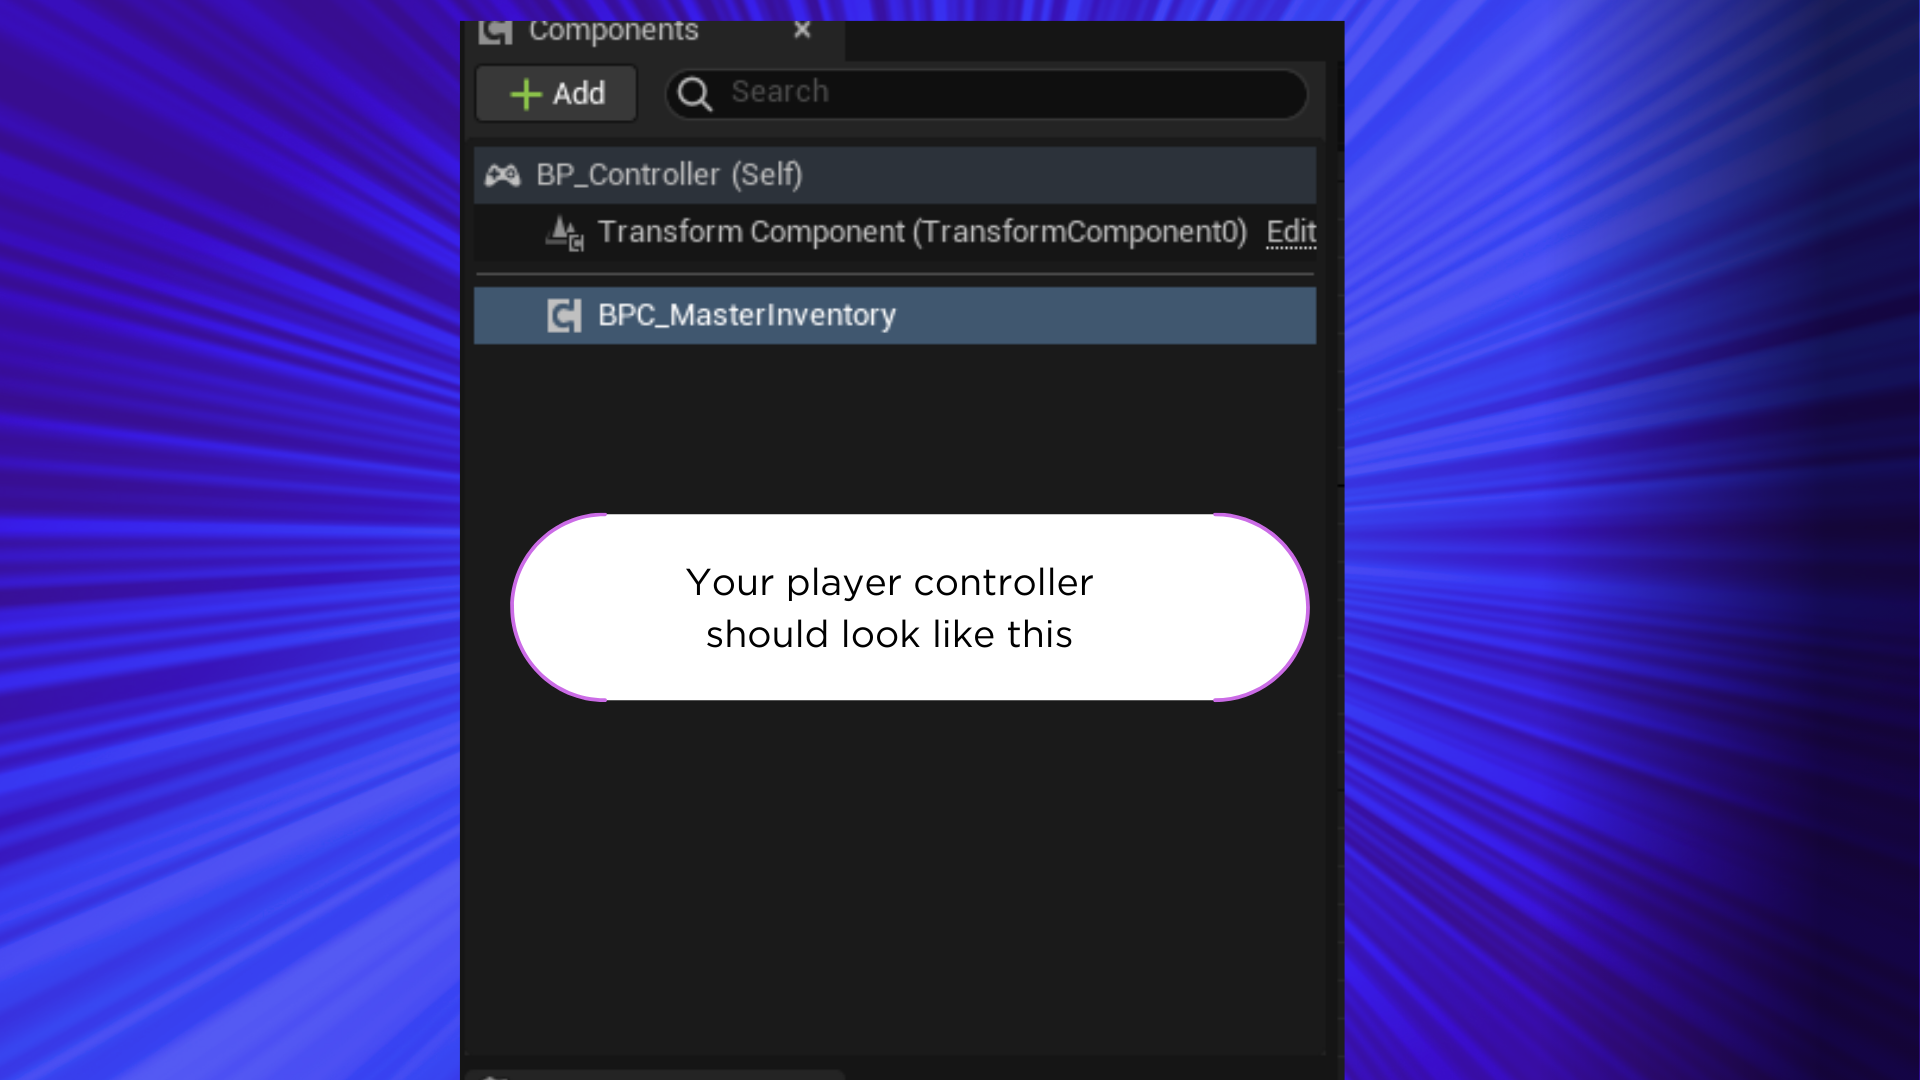
5. Now open your player controller and add the BPC_MasterInventory component.
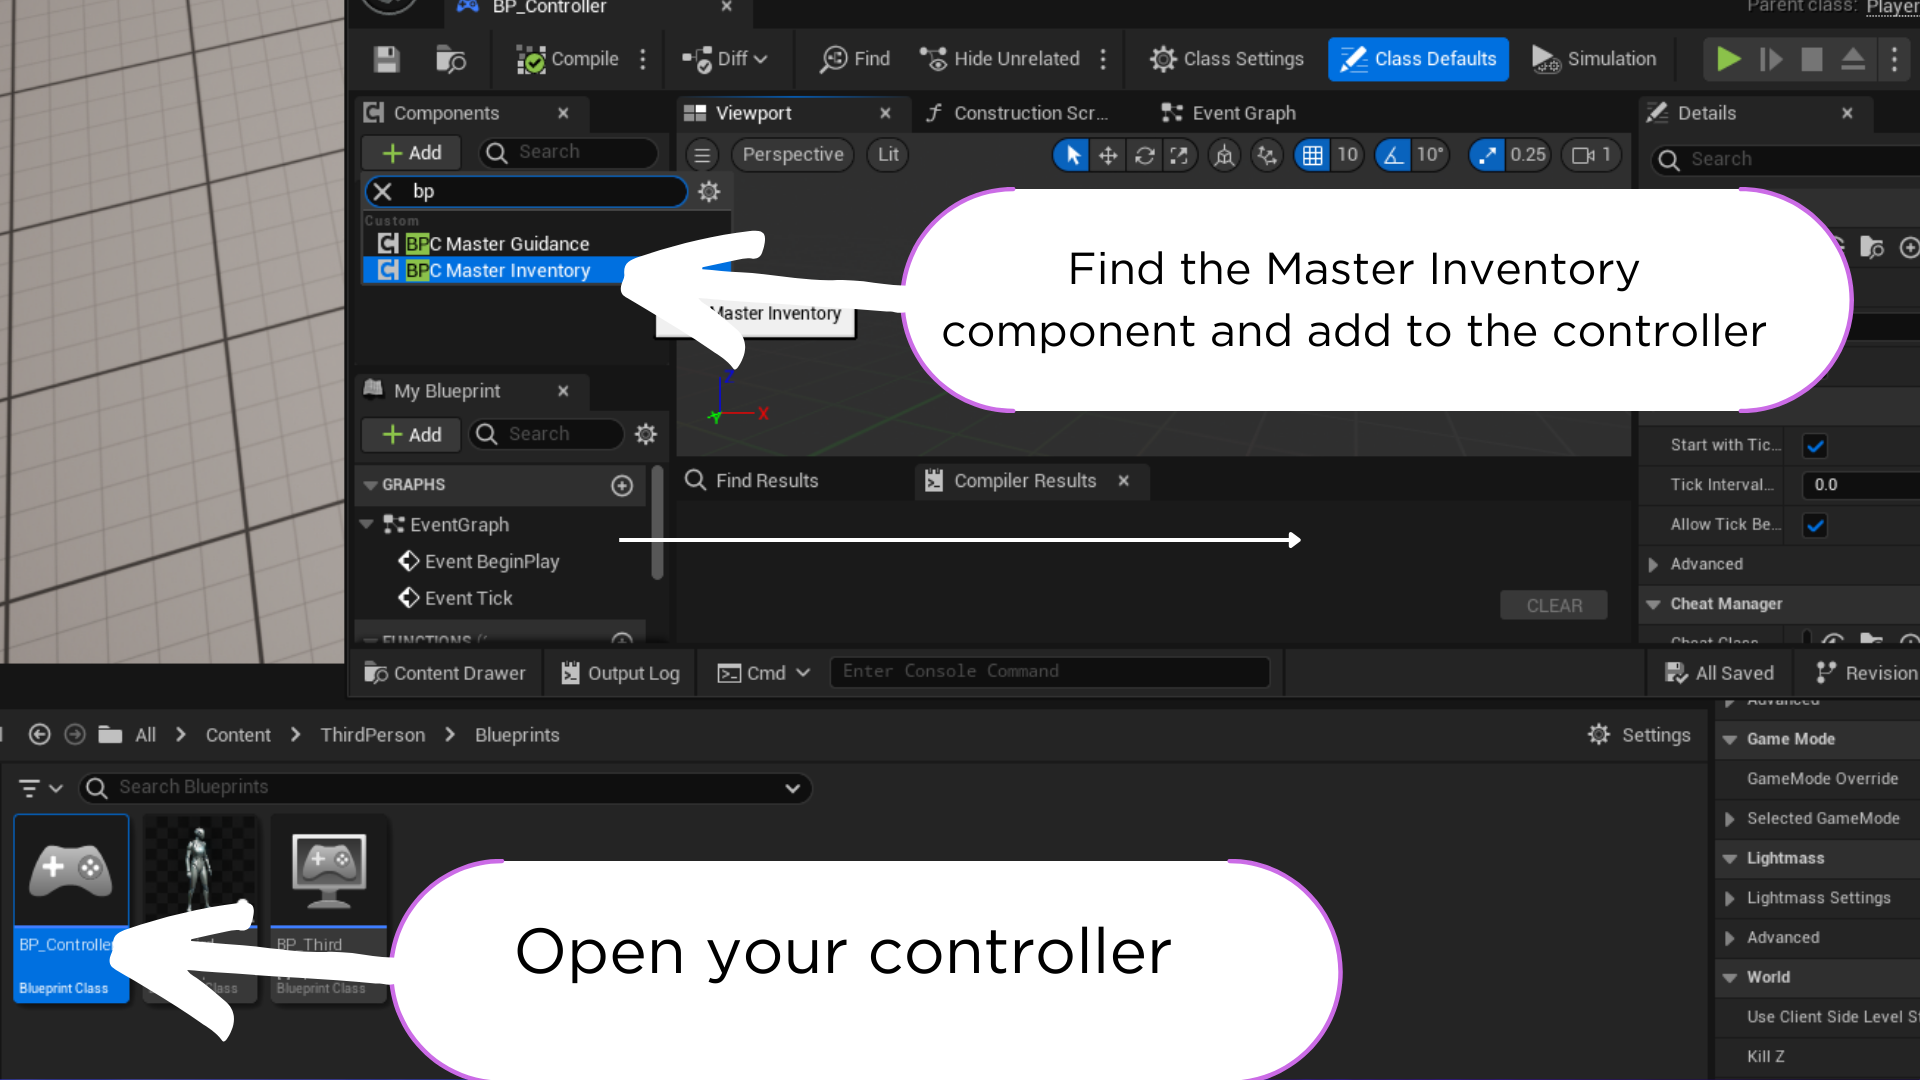
6. Now your controller should look like this.
Next we need to transfer the example events from the BP_MasterInventoryController to your controller, to do that follow the next steps.
7. Find and open the BP_MasterInventoryController in the content browser.
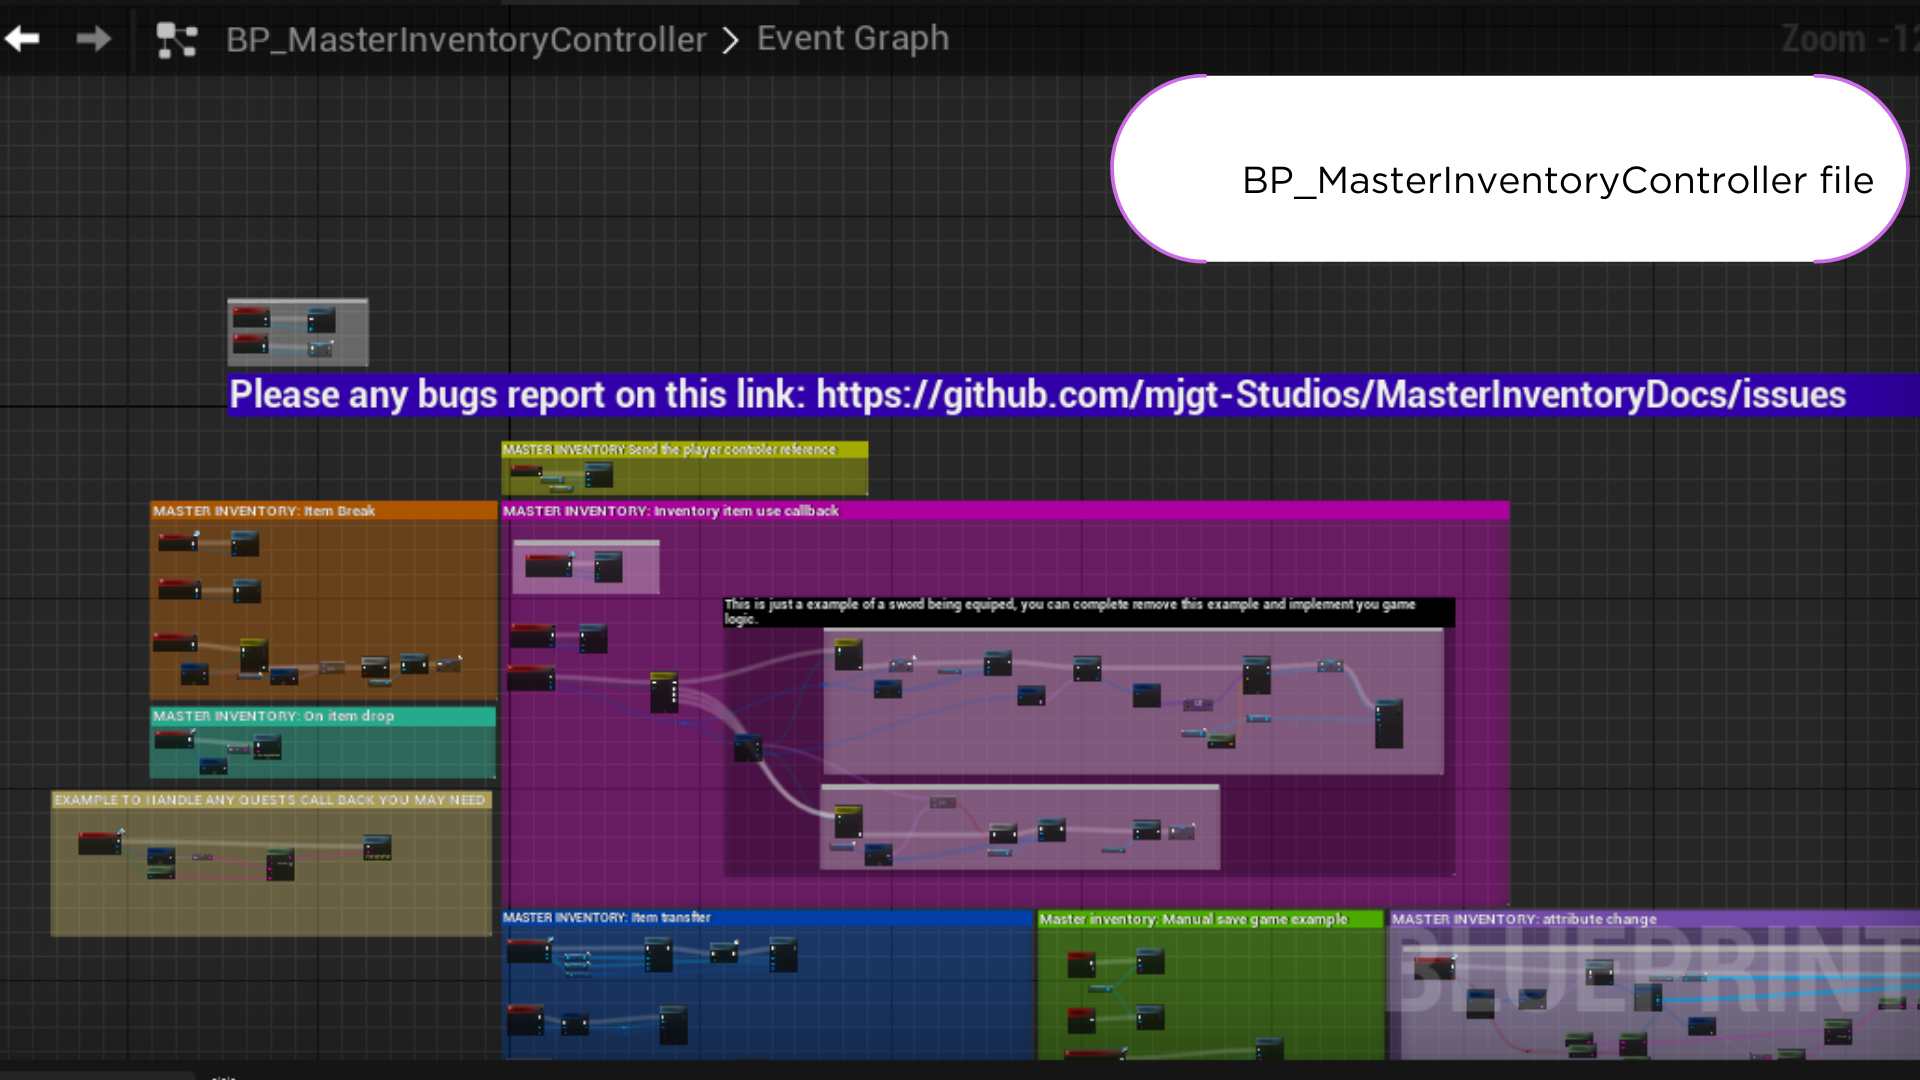
8. Next copy the events from the BP_MasterInventoryController to your controller.
Best tip here is to copy from botton to top so the engine don’t get confused with the references, there is not need to copy all the events, but if you don’t you may miss some functionality.
The pivotal event is ‘StartMasterInventory.’ This event initiates and assigns all inputs to the player pawn.

(03) Controller inteface implementation
Now is recomented to have a reference to the player pawn in your player controller, in this way we can acess the spawn point. camera and some other functionality that we goin to use in the interface implementation.
9. Now you need to add the BPI_ActorInventory interface to your player controller.
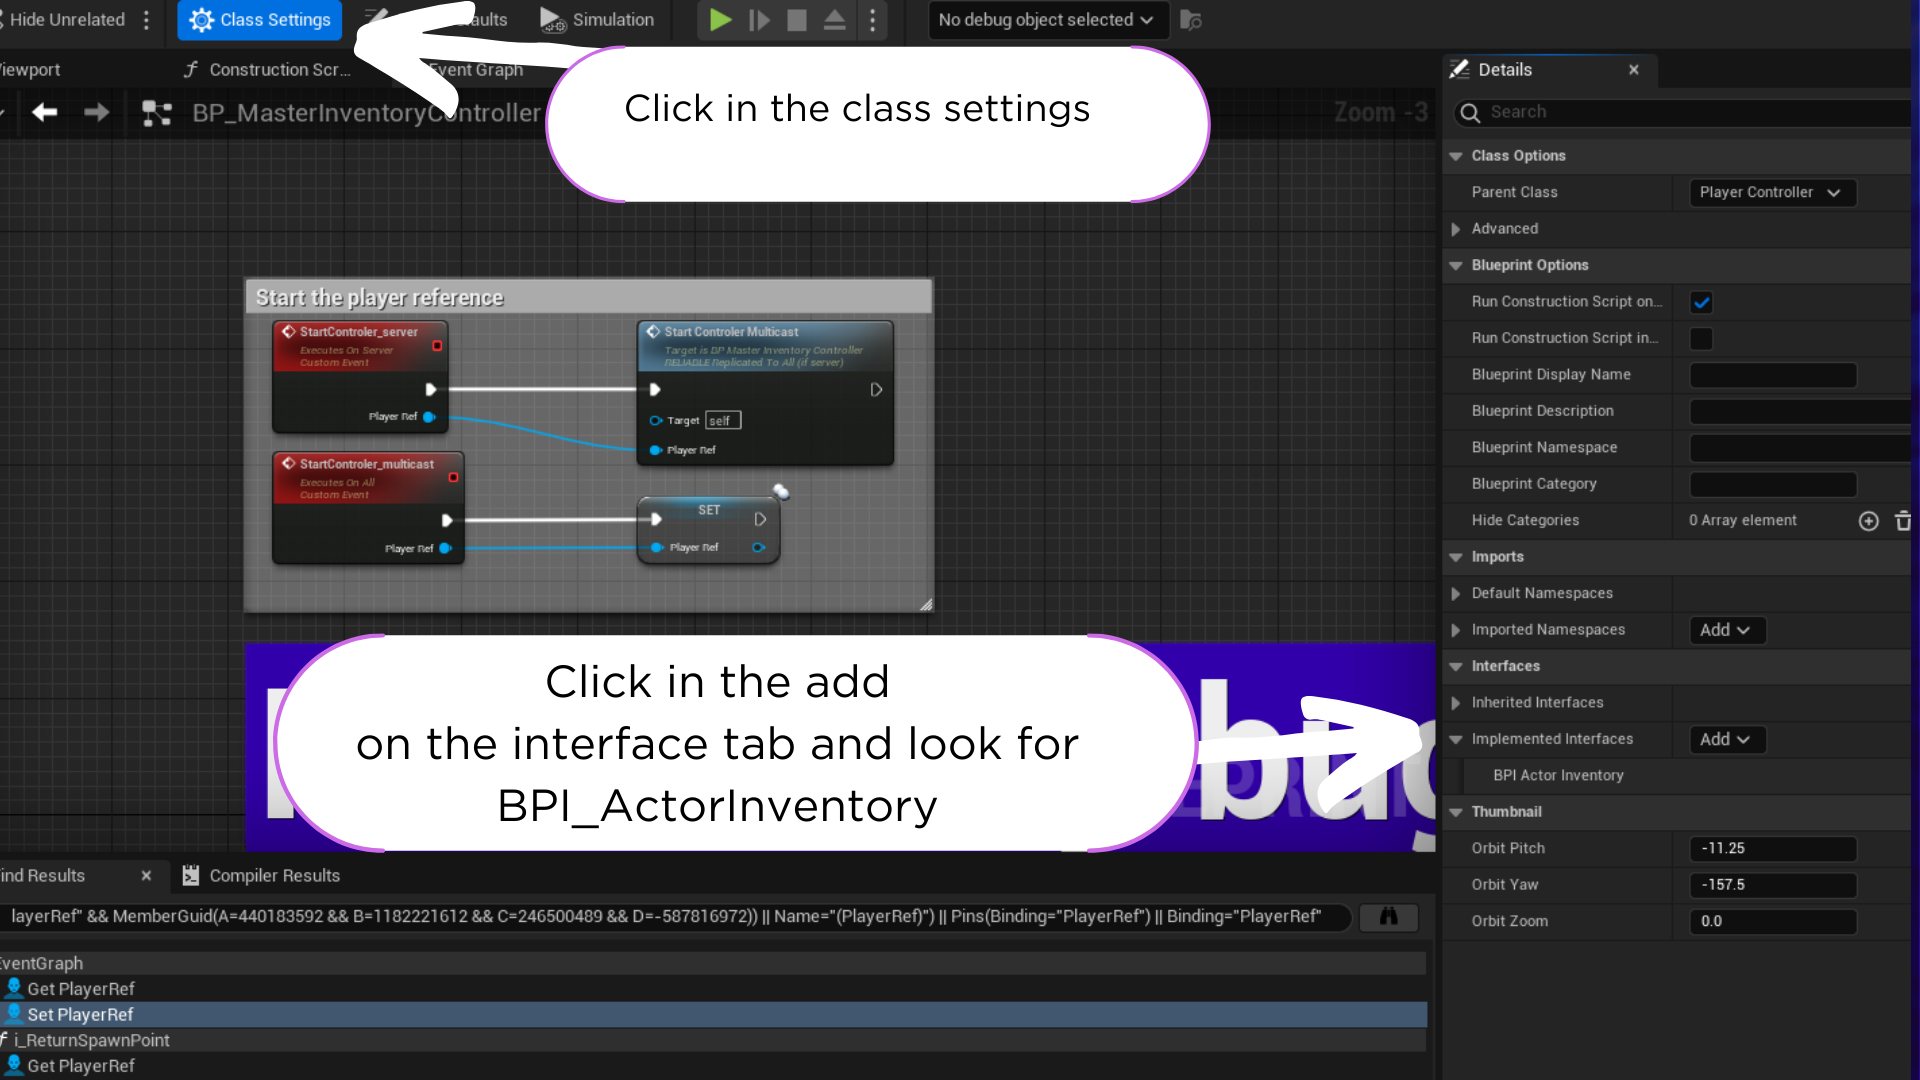
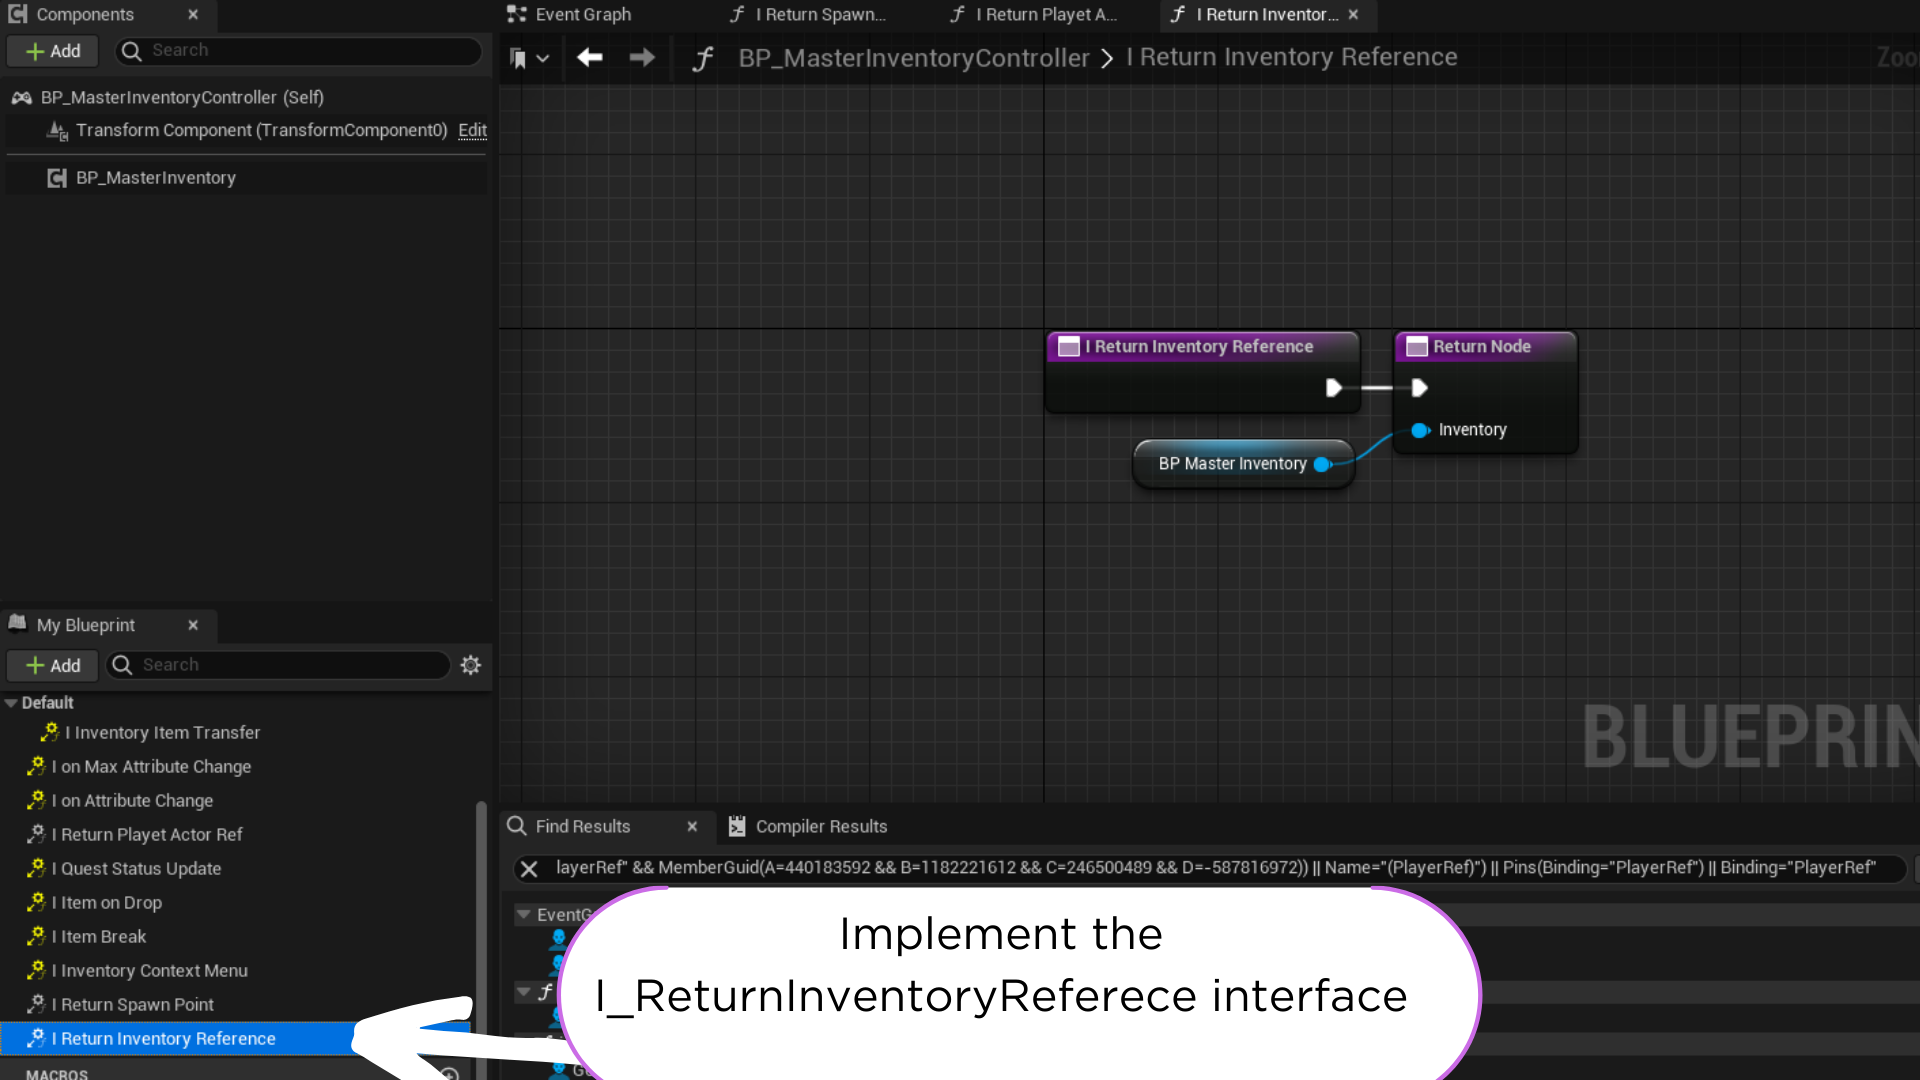
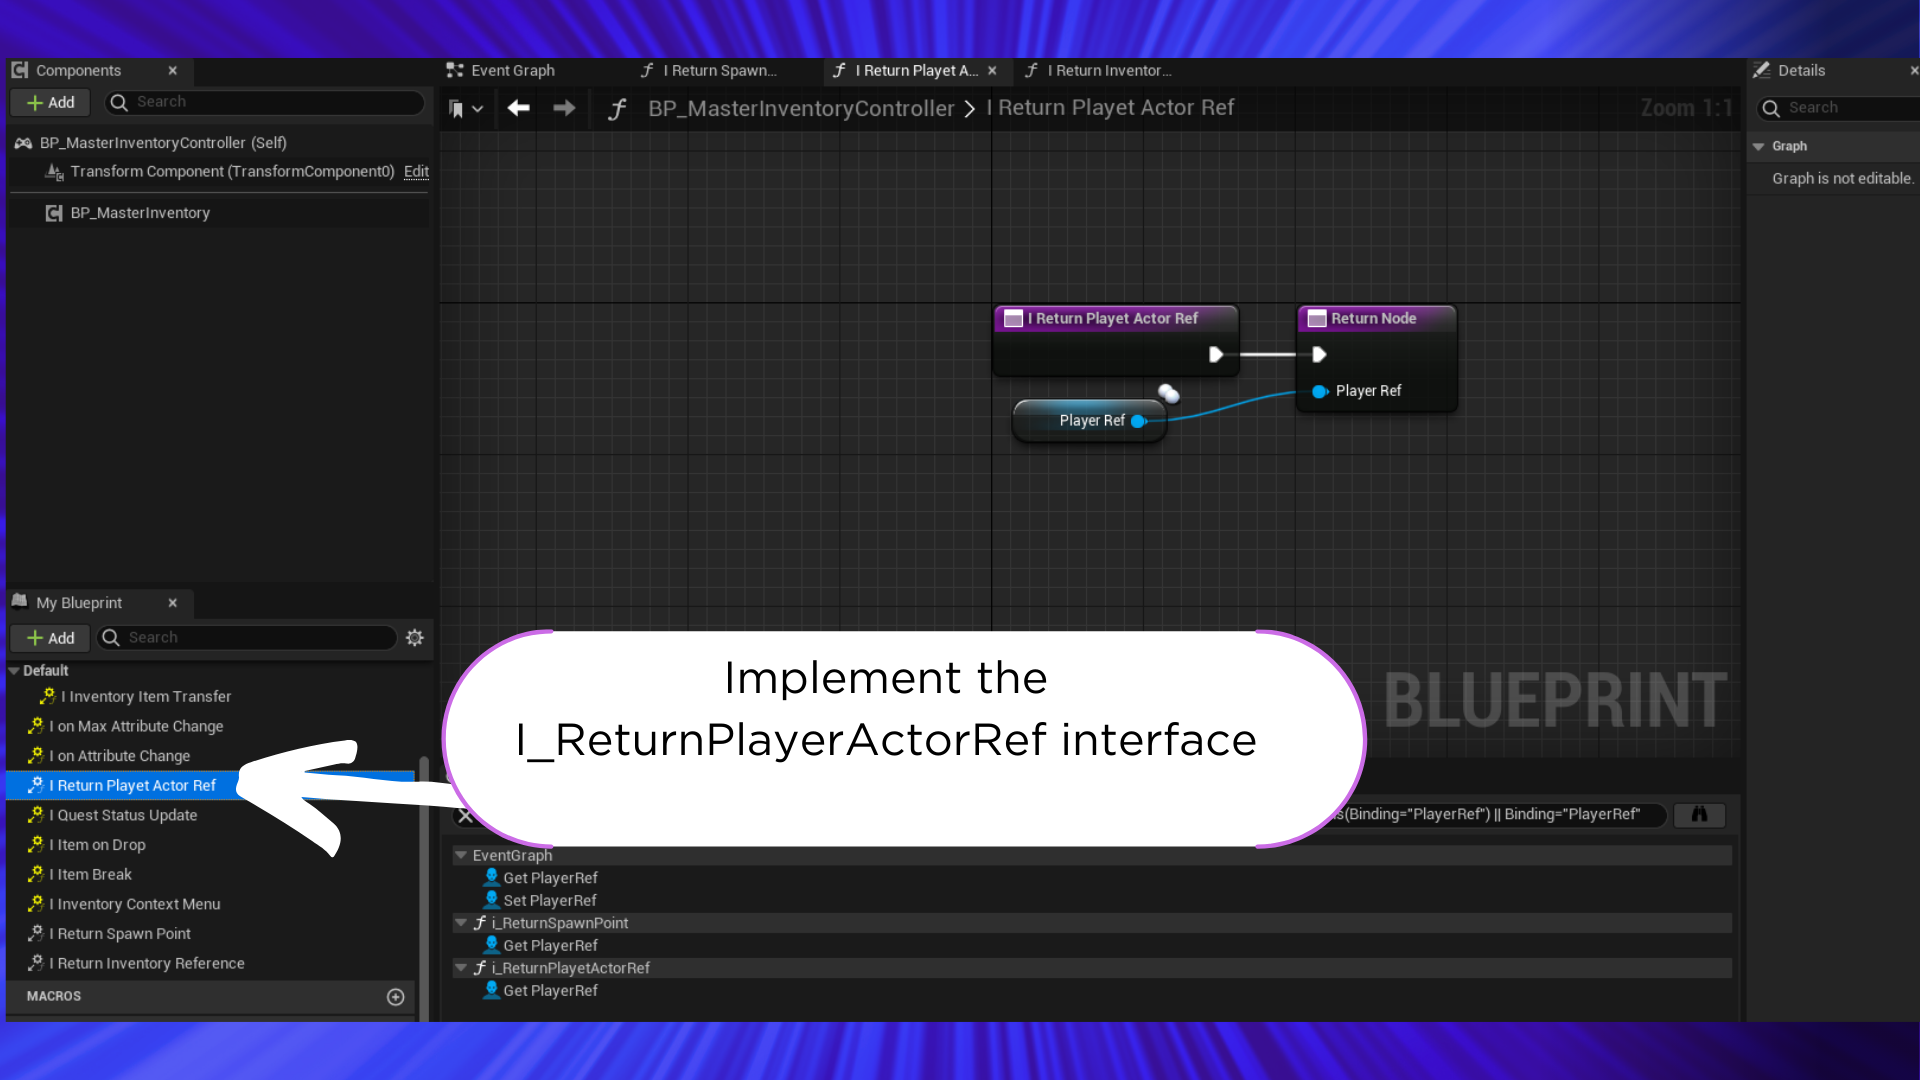
10. Now you need to implement 3 main interface events, i_ReturnPlayetActorRef, i_ReturnSpawnPoint and I_ReturnInventoryReference.
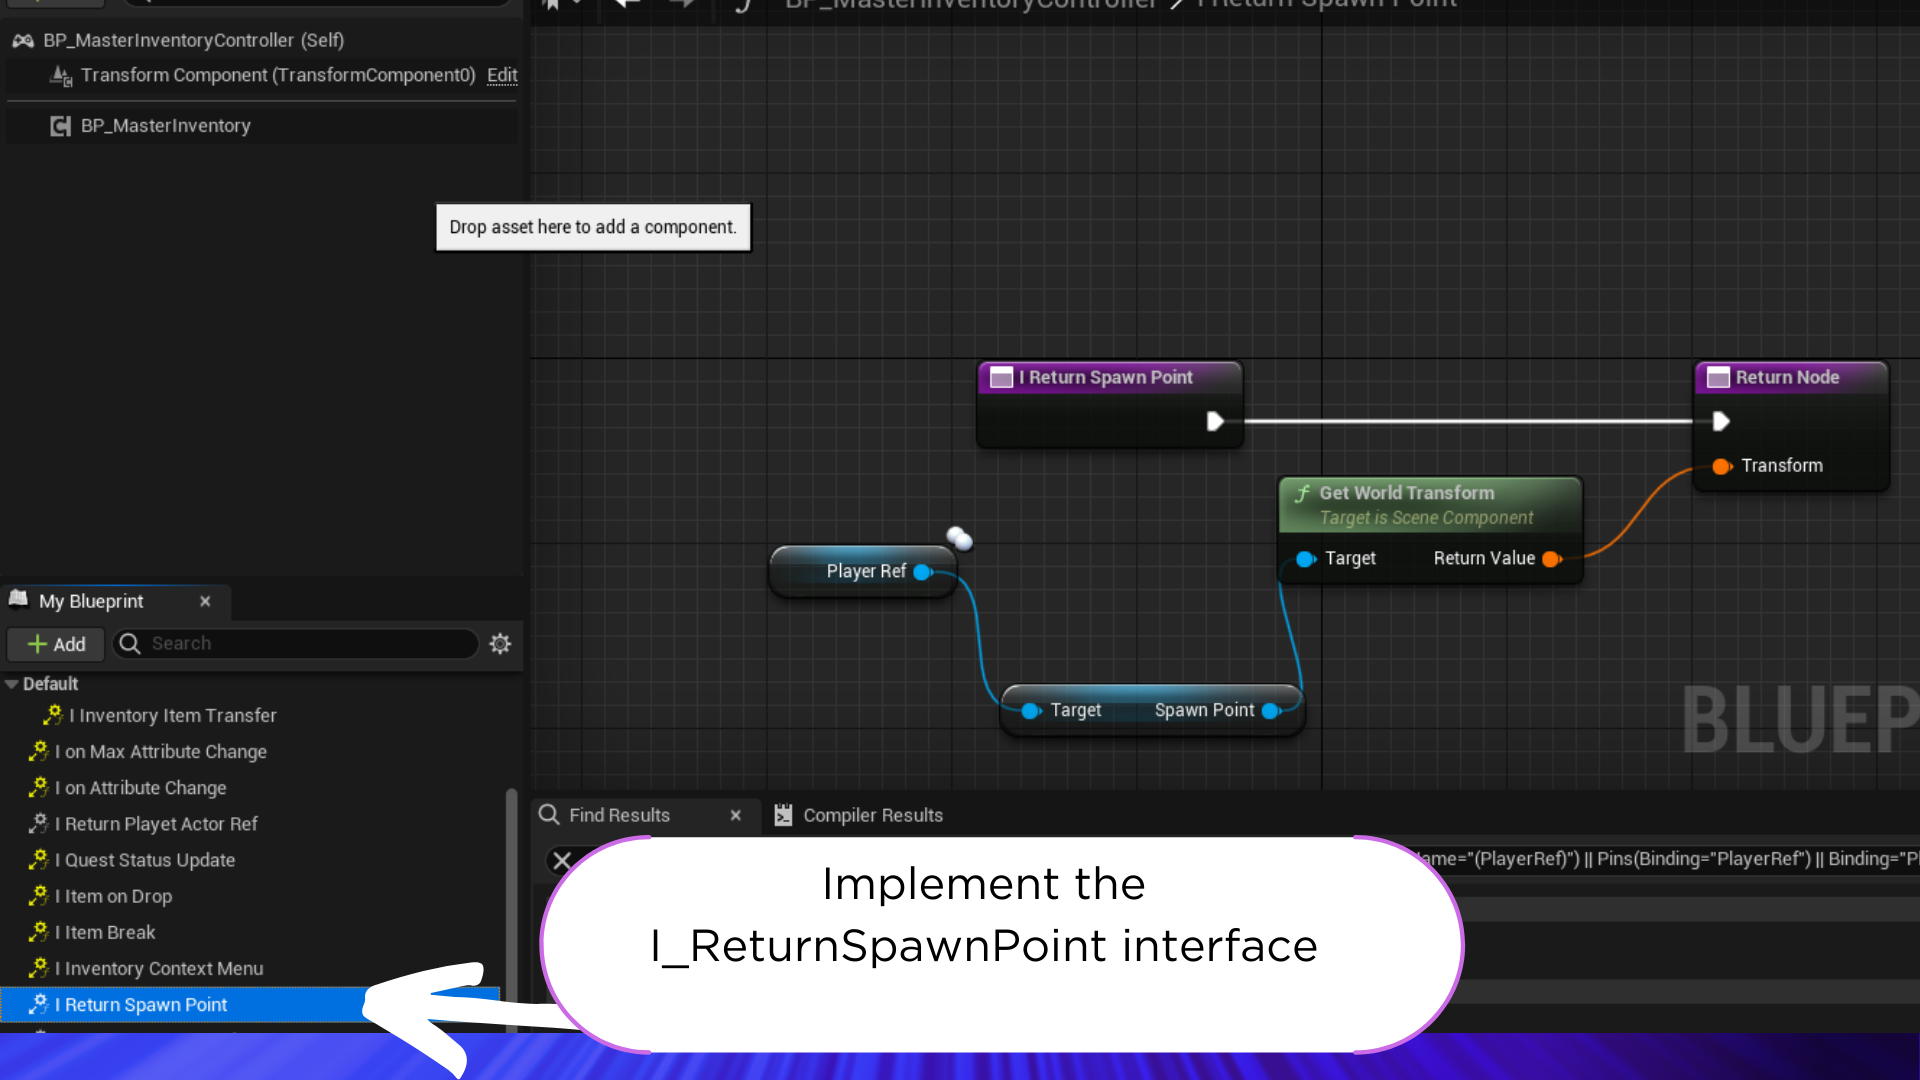
1: First lets implement the i_ReturnSpawnPoint event, this will tell master inventory where to spawn the items when droped.
2: Now lets implement the I_ReturnInventoryReference event, this will return the inventory reference to the master inventory so we can access in external blueprints.
3: Now lets implement the i_ReturnPlayetActorRef event, this will return the player reference to the master inventory so we can also access in external blueprints and internal.
At this point you have the master inventory integrated in your project controller, now lets test it if some feature is not working please check the demo controller and compare with yours.
(04) Player pawn implementation
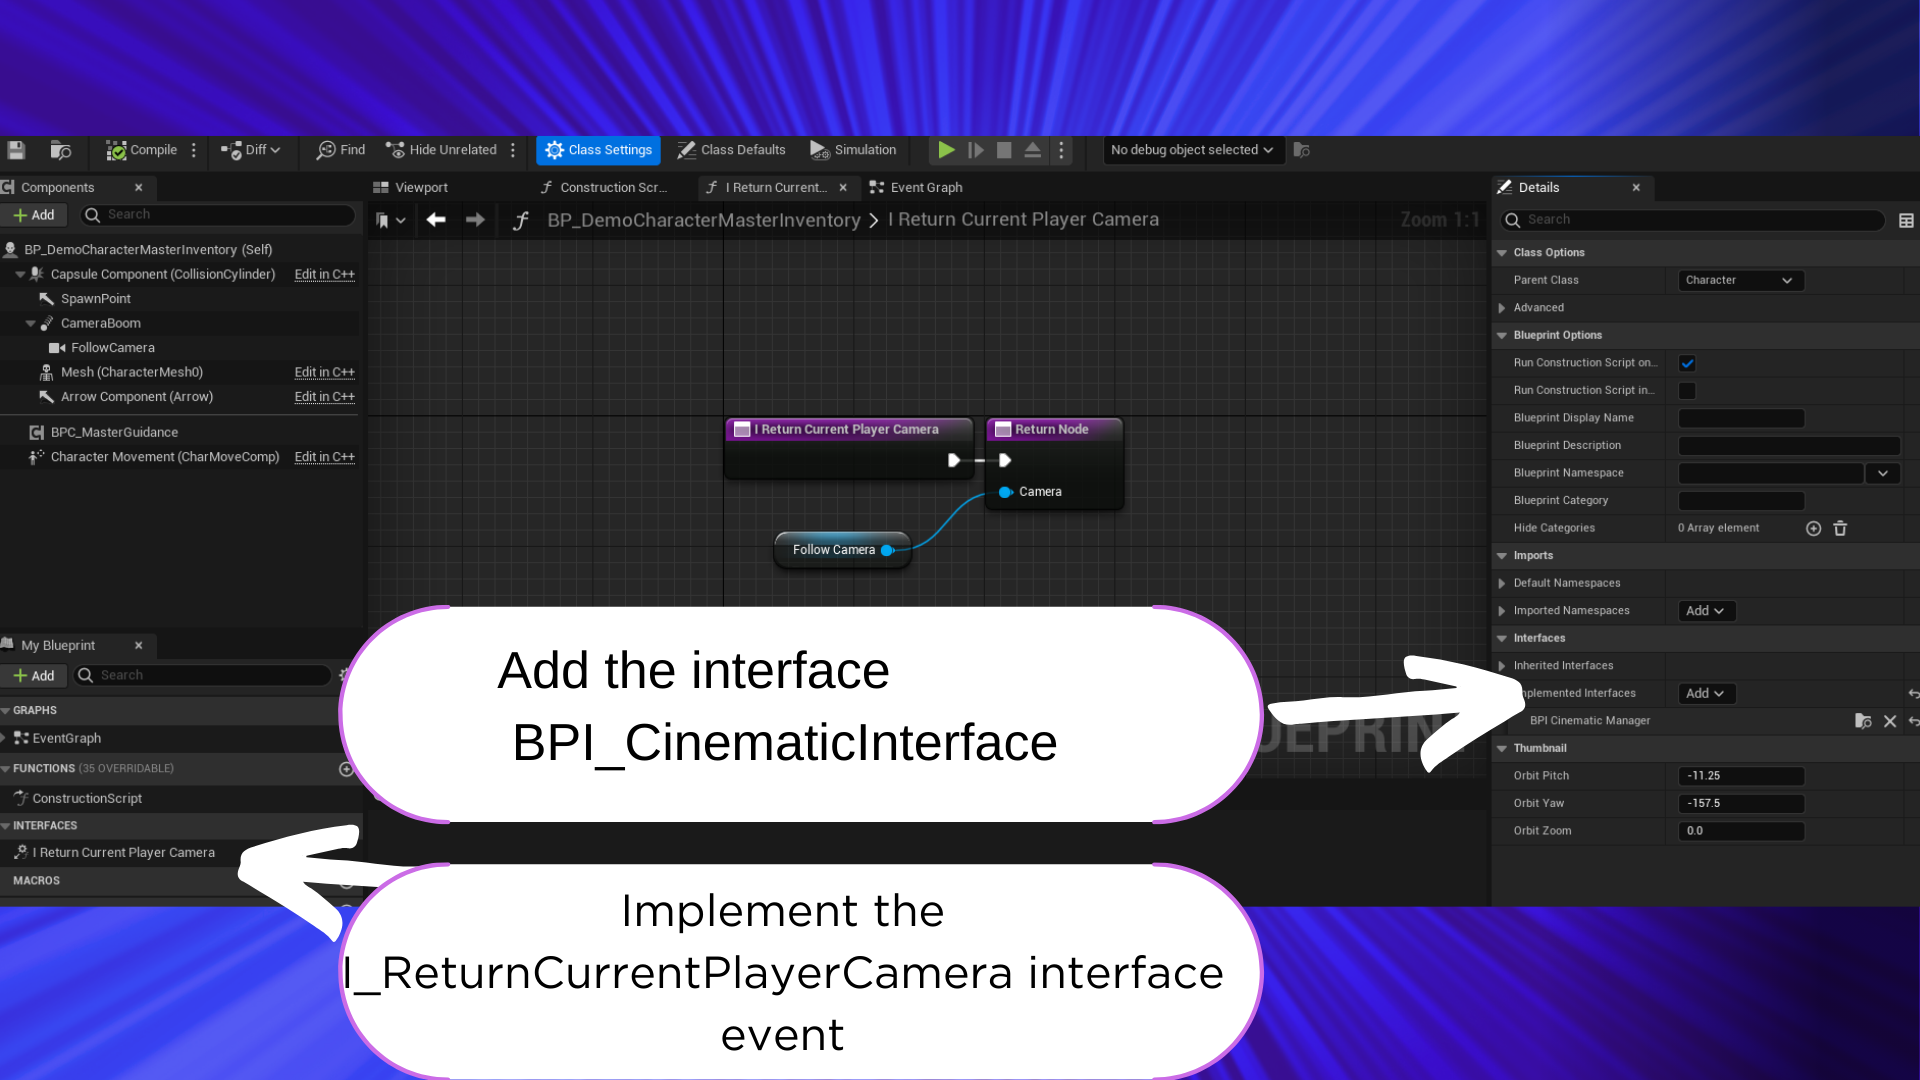
Master Inventory also comes with a Guidance system and a cinematic manager to proper implement follow this steps.
12. Open your player pawn and add lets add the BPI_CinematicInterface interface to your player pawn.
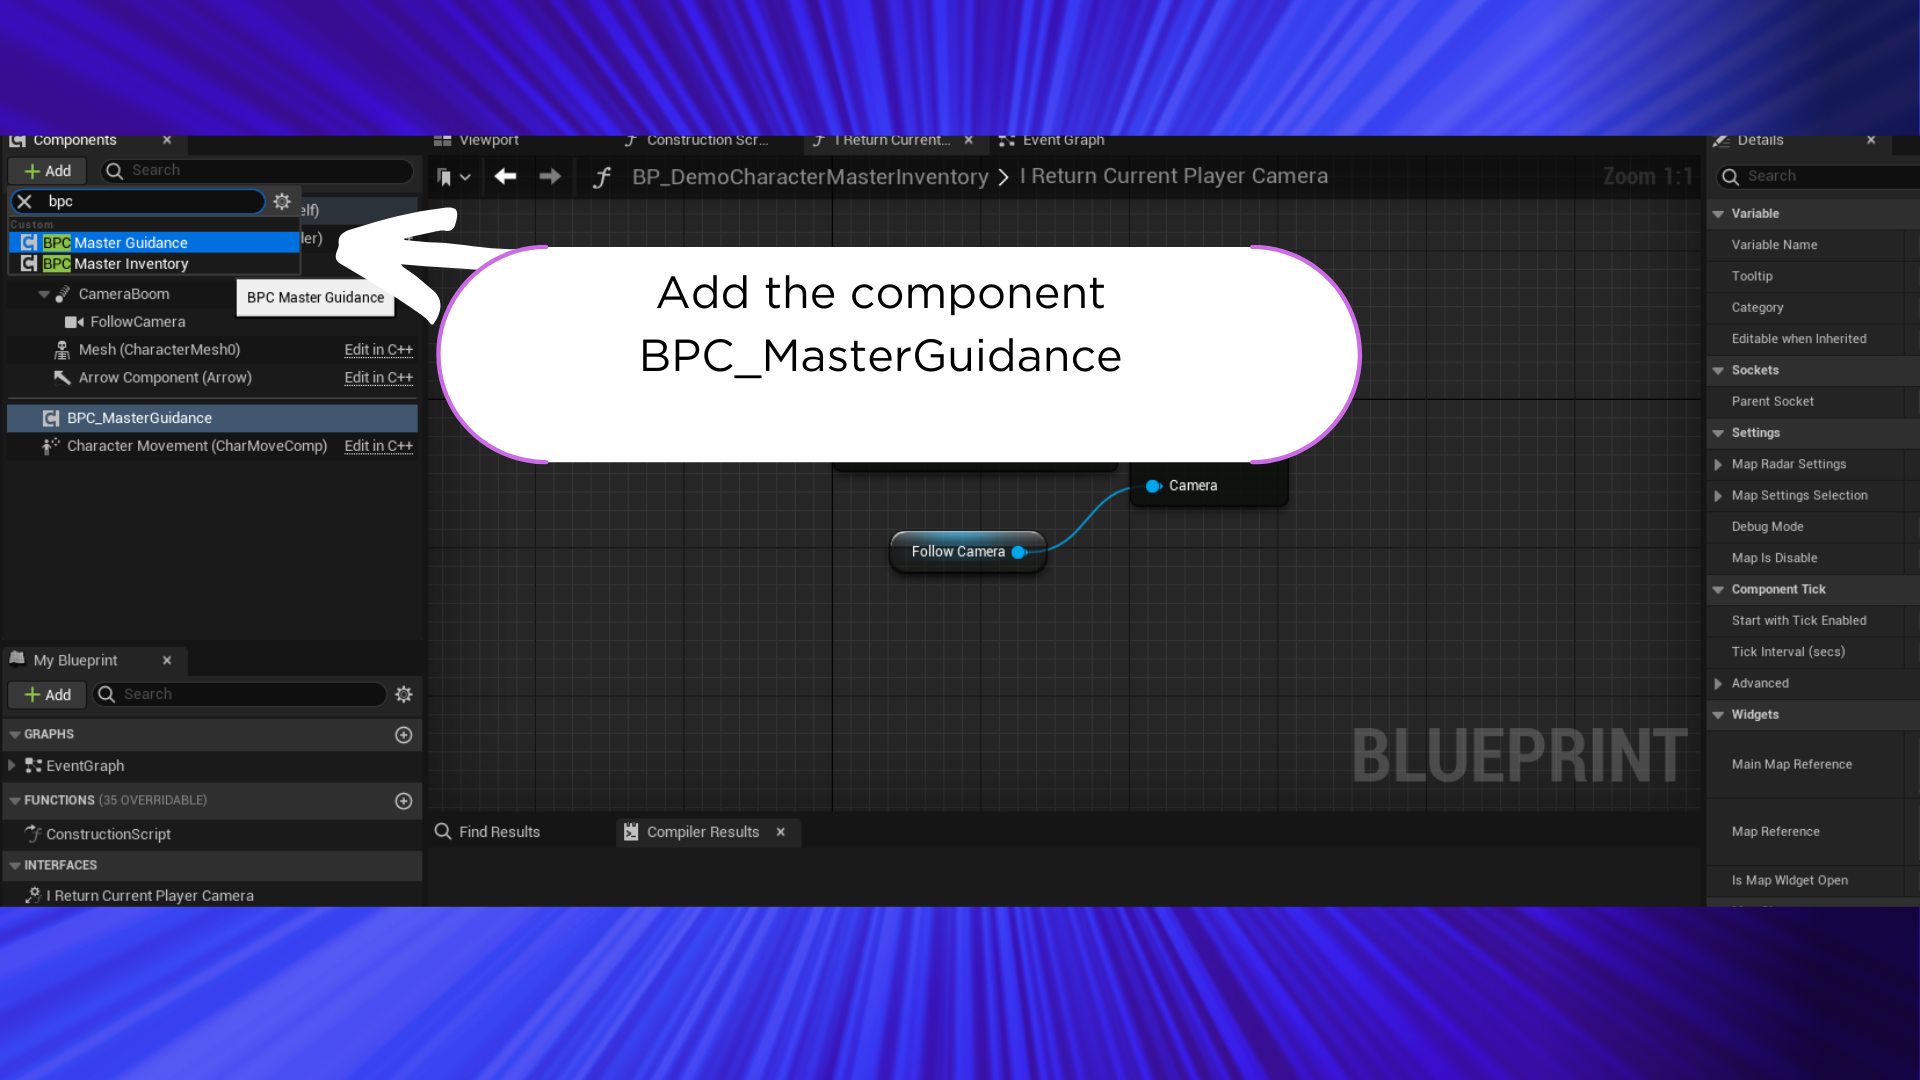
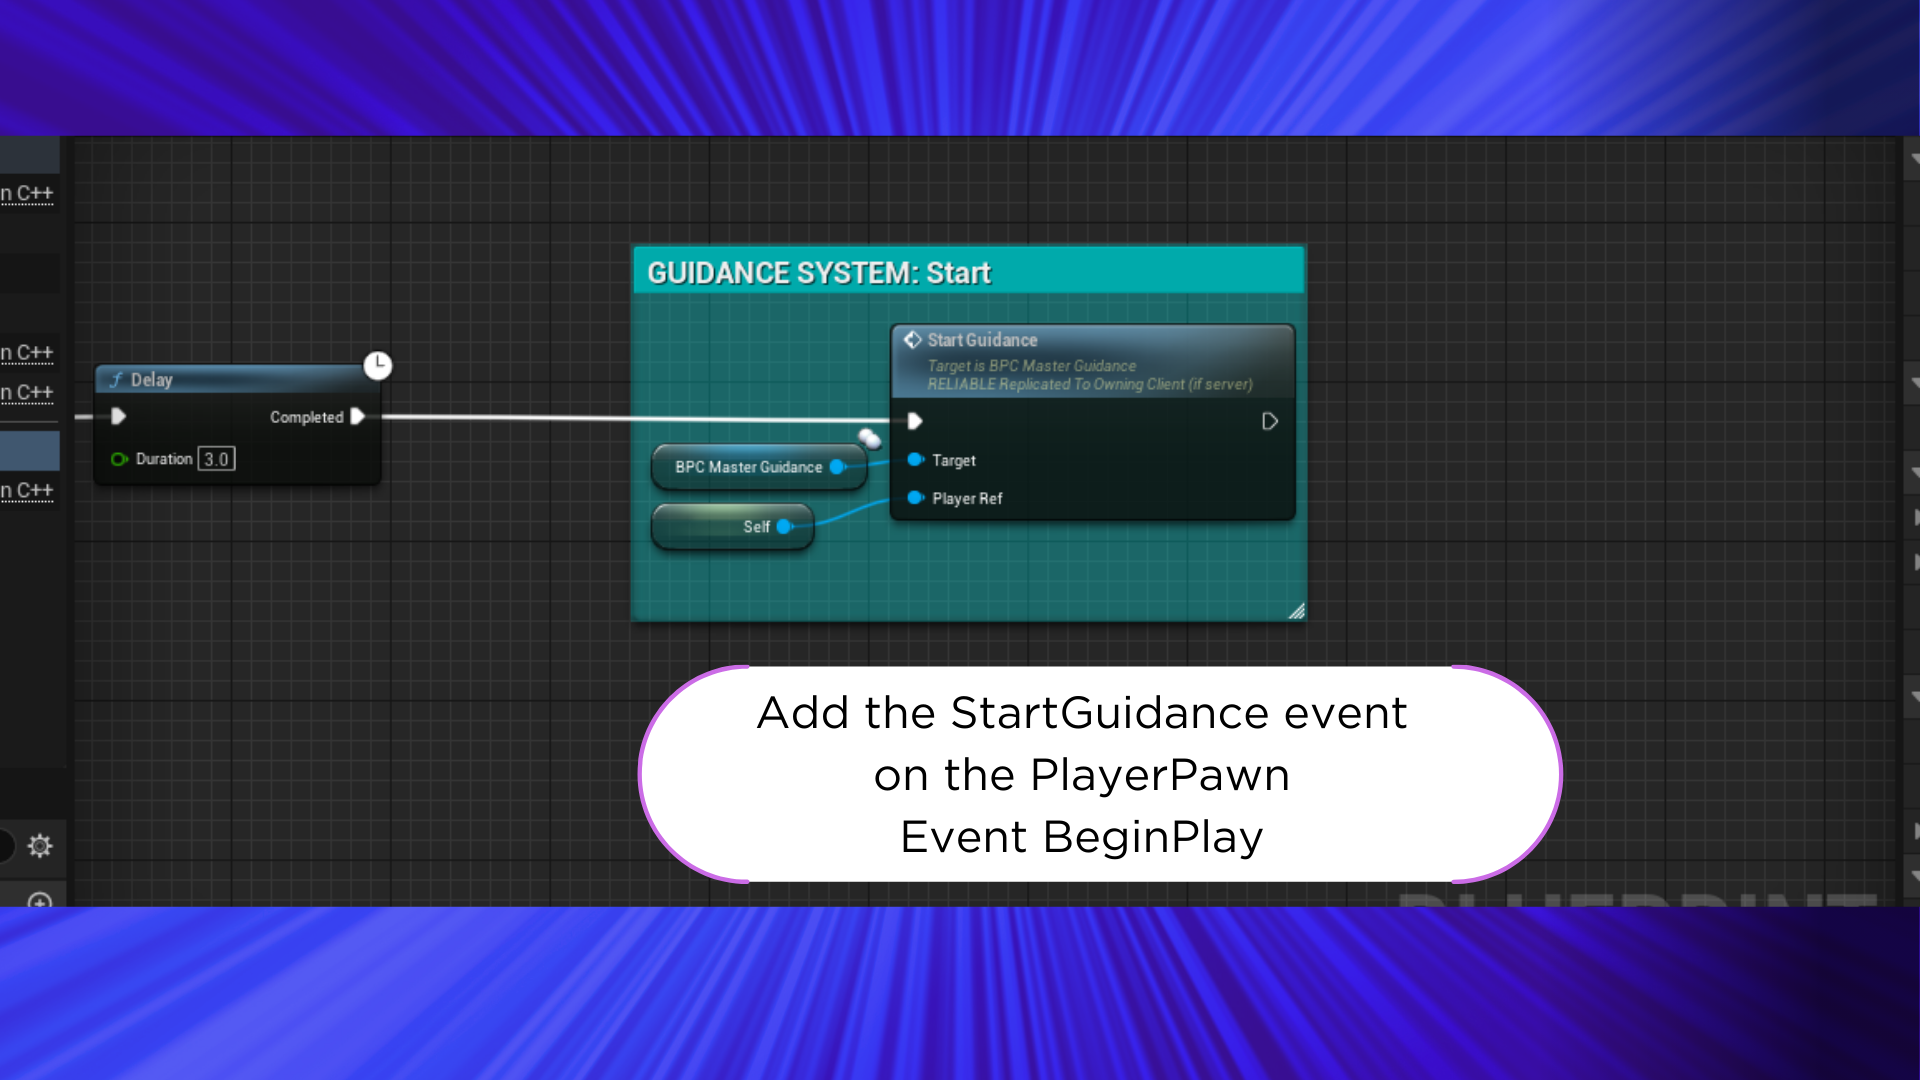
13. Now we need to setup the guidance system, you need to add the BPC_MasterGuidance component to your player pawn.
14. Now call the start event in the BeginPlay event.
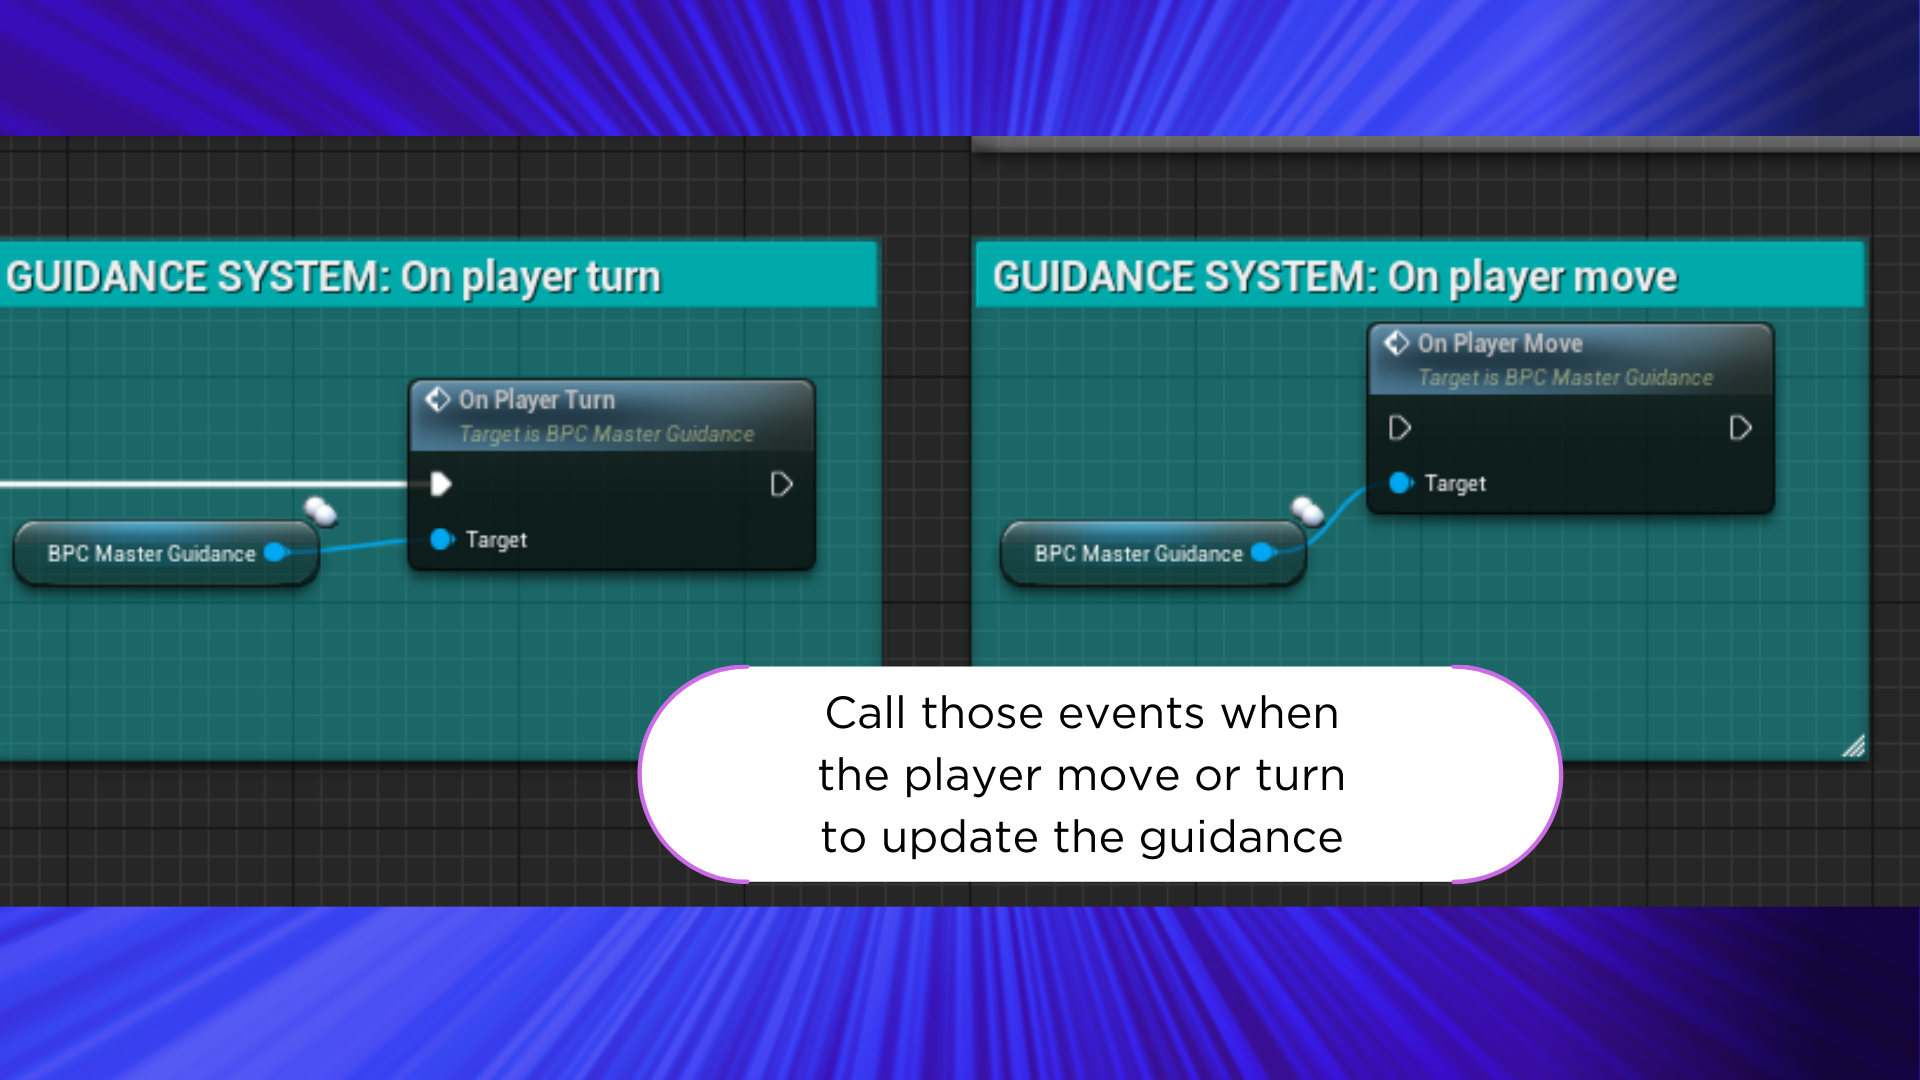
15. Now you need to call the event when the player turn or move to update the guidance system.
IF you need more information check the demo player pawn.